Sunday, November 27, 2011

Sunday Snaps #12 {Photography}

Calm after the Storm


All images copyright © B.Erin Photography/Sugar and Snaps Blog 2011
Do not use for your personal use or claim photography as your own.


These were taken after the biggest earthquake we had in Japan while we where there. We were outside listening to the tsunami warnings with a neighbor when I shot these.
Don't worry we didn't have a tsunami and really no damage other then a few friends had some broken items.

- Brit

Monday, November 21, 2011

Living Room Wall {Part 1}

I was going to put up a few posts last week but I never got to. ): I have been working everyday for the past 13 days and its just wearing me down. 2 days left then I have a 4 day weekend and we are going home for Thanksgiving dinner at my Grandmothers.

I really wish it wasn't 2 days away...

Anyway. When we moved into the house I really wanted to put a gallery wall up. But I didn't know exactly how I wanted to do it. I have so many pictures its crazy. 2 Rubbermaid totes, the big ones you like pack cloths and holiday decor into, yea. Full of pictures.. a fourth of them are from when I was younger and really didn't know how to shoot a camera properly. School field trips and such. But I did know I wanted my close family on the wall. Sadly getting photos of my aunts, uncles, and parents is not an easy task. So its just cousins and others like the Boy and my puppy-niece. Of course my "kids" I wanted up their too.
The fun part was digging though all our boxes to find my frames. Once I found them all I tried making a layout of how I wanted them on the wall, on the floor. Here came my problem and one of my famous cursing storms. I NEED to see the frames on the wall before I know if that is how I wanted it. And since I didn't have enough command hooks and hangers I grabbed some nails and got to work.


I took a picture of the wall after I had everything up and took it back down. You can see my chalk and pencil lines on the wall. I got fed up with using the chalk line myself and just grabbed a pencil..
I knew where I wanted to start and went from there. Adding frames around others. I also knew I didn't want it to go from wall to wall so I made sure I was even on both sides.
A small problem I had it this is an older house and the wall is a little curved. Just on the one side, luckily the house is sound and its not a problem. Other then I couldn't hang what I wanted where I wanted it because of the curve. {insert another cursing storm} I was very upset but I moved on and switched some things around.
Once I had everything where I liked it, I pulled it all down and starting taking all the glass out to prep the frames for a good painting. You can see them all laying on the couch up there. :)


Placed a sheet of moving paper out and laid the frames out. Then hit them with primer. Some of them really didn't need it but I wanted to be safe. Mainly I wanted to get the black ones since my color was light. There was already a sneak peak of the color and the wall itself in my fall decorating post.

All went well other then one opps.
If you are going to start hanging frames on a wall. Maybe take the glass out first and just hang the frame. 
Might save a life.
):

Frame is still usable though and it is getting used in an upcoming project.
I have already started making some Christmas decorations. I maybe will have a few up here next week. 
Working on something with an old window. 

Will see you later this week!


- Brit

Sunday, November 20, 2011

Sunday Snaps #11 {Photography}

This is..


All images copyright © B.Erin Photography/Sugar and Snaps Blog 2011

Do not use for your personal use or claim photography as your own.

Sunday, November 13, 2011

Sunday Snaps #10 {Photography}

A Day in the Sun


All images copyright © B.Erin Photography/Sugar and Snaps Blog 2011
Do not use for your personal use or claim photography as your own.

Friday, November 11, 2011

Pine Cone Frame {Tutorial "My Way"}

So remember Sunday when I showed my fall decorations and said some people might recognize this guy?


I have a little story before I share how I made him. :)
You see one of my best friends had these beautiful dusty frame under his stairs for a couple months. It just randomly showed up there one day. Well for me, he bought it between when I had left the night before and before I came over the next night. It was to be a gift for his girlfriend who was another one of my good friends. That whole thing didn't work out and he ended up giving it to me before we moved. Oh how I love that kid!
 Haha anyway after I laid this frame in the basement of our house I stared and stared at it every time I saw it sitting there. I knew it looked familiar, and it did. You see when I finally grabbed it to do something with it I saw the back.


Yes that would be the $40 mirror or the $30 frame from Ikea.


 Don't know what one because it only came with the back. No glass or anything, but I am assuming the frame since it was a cardboard back. Someone made this bad guy some type of destination board. But I wanted something else for him.
So I re covered him with some paper and got started.
My friend only paid $8 for the frame from the thrift store. Lucky him and even luckier for me!
Now, for this project...
You Need
A frame (Optional)
Scissors
Ribbon
Pine Cones (I bought some scented ones for cheap at Pat Catan's)
Hot Glue


Take 6-8in strips of your ribbon and glue to the top of your pine cones.
Gather the ends and stagger them before you tie the ends together. So they fall and lay nice against where ever you hang them. 
Now this one didn't turn out as well as I have made them in the past. I was going to make another and hang it on the front door but I didn't get around to it. But they can be hung anywhere and you don't need a frame. 
I didn't take really any pictures because this is pretty simple. But if you want check out Whatever Deedee Wants for a easy tutorial I found to share.
Instead of hanging them right one the wall I used the covered frame back to attache them too. Even thought they were not to heavy I made it stronger then I really needed to.


I wrapped wire though the knot and pulled it though a small hole in the card board. It tighten it up I took a bobby pin and twisted it a little to pull it in. Next just put some hot glue on it and held it till the glue was tacky.

Finished.


- Brit

Monday, November 7, 2011

Smelly Goods {Tutorial}

Ever see those decorative water beads? Well how about some with a scent, like a reed diffuser or potpourri? Really easy item to decorate with and they can give your room a great smell. I have done these a few diffrent ways over the years. Mainly with the crystals and scent oils but this was a quick thing with some times I had on hand.


You Need
Vase (or something to hold them in)
Water Beads (Dehydrated.) Or Crystals
Liquid Potpourri, Diffuser Oil, or any scent oils 
(if using pure scent oils add some water to diffuse the scent a little since the beads absorb a lot of liquid.)
Food Dye (Optional)


Pour beads (amount depends on the size of vase) into vase and add liquid. If your liqiud is clear or not dark enough add a few drops of dye, color of your choice, and let the beads hydrate.

Tah dah!


Fast simple and smells great!

I did of course decorate the vase a little after this. Sorry no pictures. ):

- Brit

Sunday, November 6, 2011

A Little Fall Decorating

I didn't get to decorate like I would have liked to this year. Better then last year since I didn't have a house to decorate, but I did get to decorate my parents for Halloween.. which I missed this year. Well I skipped it since I knew I wouldn't get anything finished. Still didn't get all my fall decorations finished but I am done for this year. Figured just stop now and start on Christmas.
Yea I said it, its only the beginning of November and I am starting on Christmas things. I actually want to get fully decorated for one holiday! December is a very busy month for my family, all winter really, but December mainly. It would have to be my family who's birthdays fall all winter. Most of them at least, we have a birthday or 3 every week. The week of Christmas is the best! My aunts birthday is Christmas eve so its always a tradition for my sister, mother, and I to sit down and call her around midnight Christmas eve. Wishing her a Happy Birthday and Merry Christmas all in one. My Grandmother's birthday is the day after so its a big weekend at her house. Close cousin's birthday is then the 29th and then we have New Years. Its like a 2 week holiday. Man did I miss all of it while we were in Japan. Even though we are only 2 hours away now I am hoping we get to go home this year. With the Hubby's family now our holidays are a rush, can't wait to see it when we have kids.
Anyway, once December hits I wouldn't get anything done. So I am starting down, which means after Thanksgiving I start tearing down the Fall decor. Like right after dinner. :) Not really, my hubby would have a fit. But Black Friday and over the weekend, nothing will survive. Kinda makes me sad since Fall is my favorite season and snow has already ruined it.

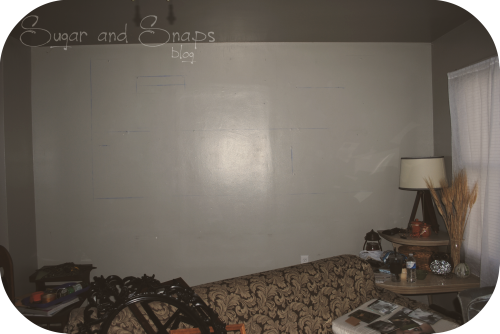
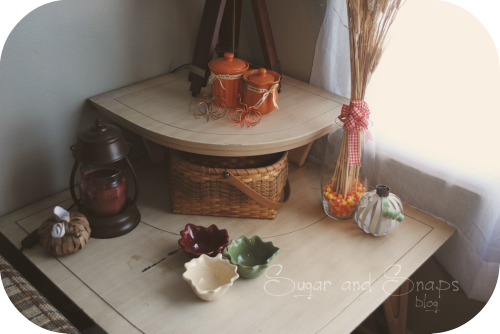
Ignore the furniture, I know none of it matches. It will all be fixed hopefully in the spring.


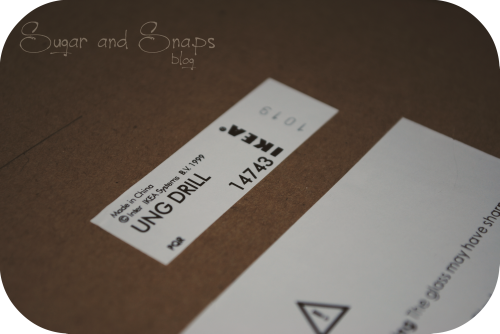
This stand will be moved into our bed room very soon. That is where it belongs after all, but for now it holds some fall items. The lantern is a new addition after Herbert's first trip to Ikea last week. I had to get it since I have been "ogling" it forever as the hubby says. Did you know they have large ones now! Like almost as big as my milk can. Wait... I never showed you my milk can, well its a big milk can. I am sure you know what I am talking about.


I forgot my mirror iTouch screen there :( sorry. Imagine I am waving to you
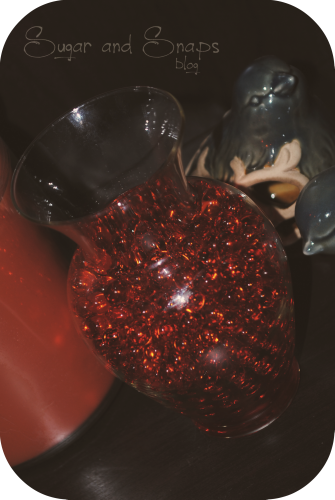
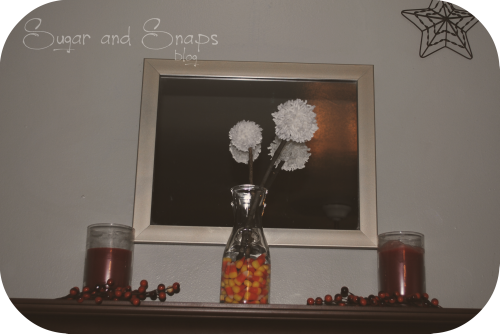
 Anyway I am happy to announce that I will not be killing all the movers that packed our things. I found my West Moreland Glass last week and I squealed in joy! It was given to me by my Nana (My Mom's, mom) before I left for Japan. My mother grew up only about an hour from where we live now, and My Nana's family bought a lot of West Moreland Glass growing up. I love this vase so much and I would have bawled and hurt someone if it would have been broken. 
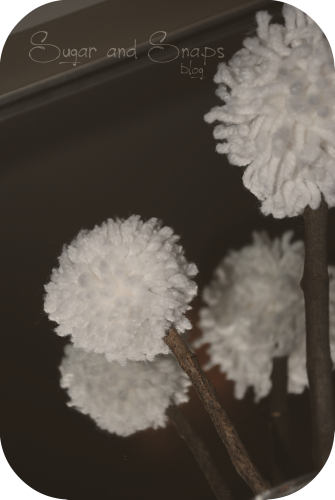
It holds some pom-pom flowers that I made last weekend with Herbert. I use to make them all the time when I was little. So I showed her how to make pom-poms and we made some "dandelions" for fall. <3
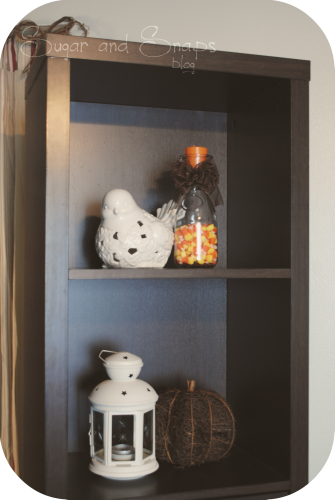
Some paper pumpkins on the shelves below since there were bare. I really need to unpack our books... 


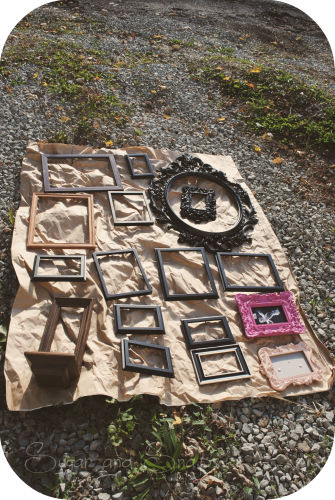
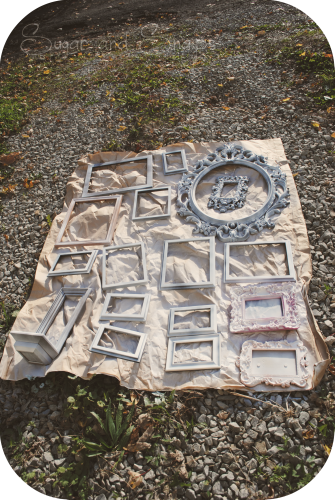
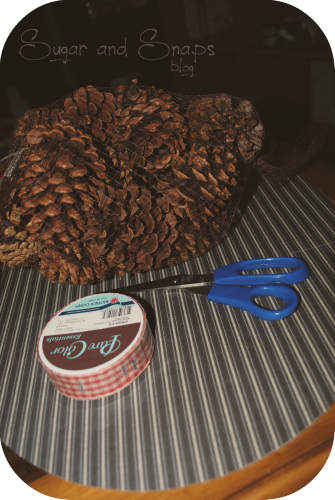
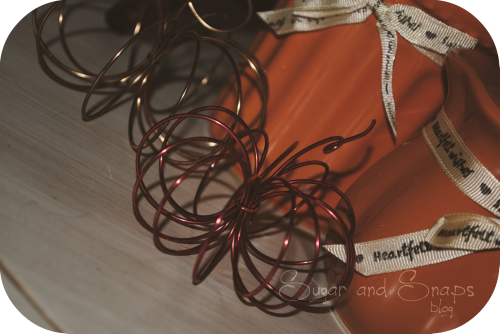
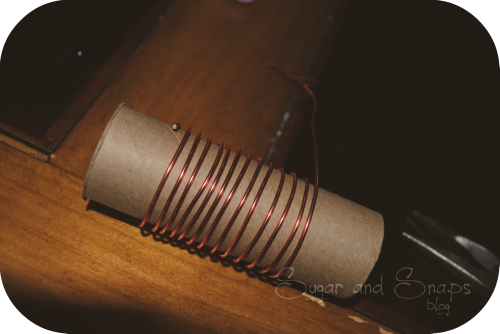
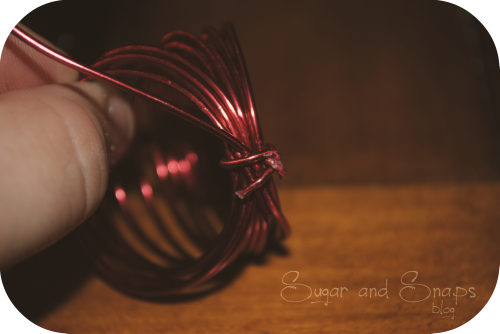
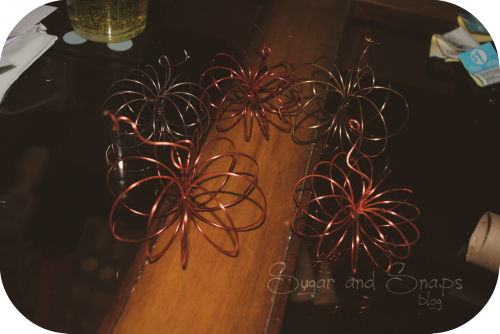
Some more dandelions on one sneak peek of my major project the past two weeks.


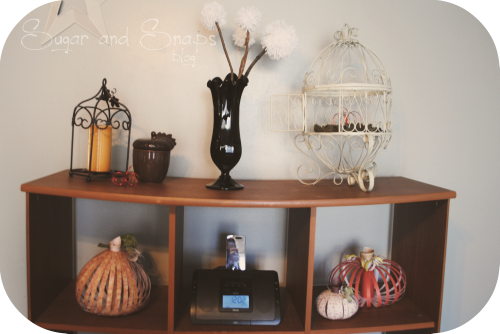
Oh this table will be the end of me. I love it so much but it REALLY needs a face lift. On it you can see my 
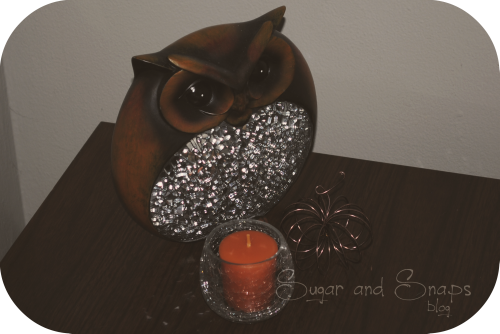
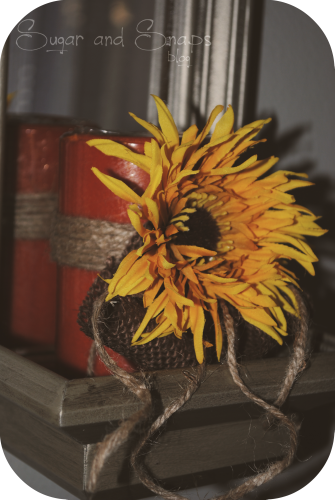
favorite little pumpkin beside my 
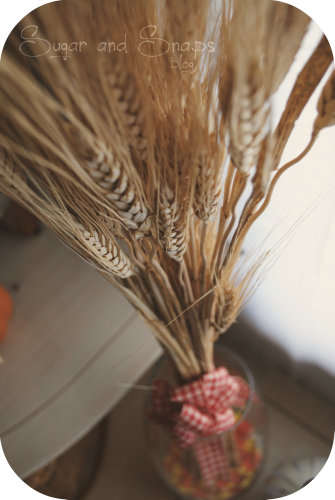
favorite candle warmer. That basket underneath hides our tv and one PlayStation 3 remote since that is our "tv." A little candy corn in the bottom of a vase full of some wheat with a pretty little bow.


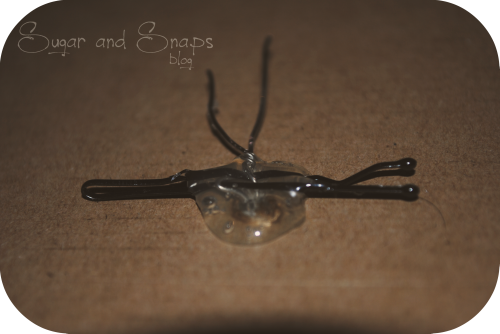
Another sneak peek of my big project! ;) Also remember 
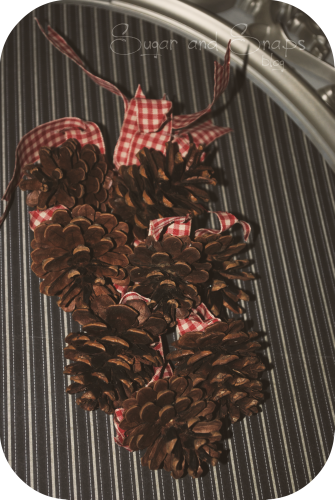
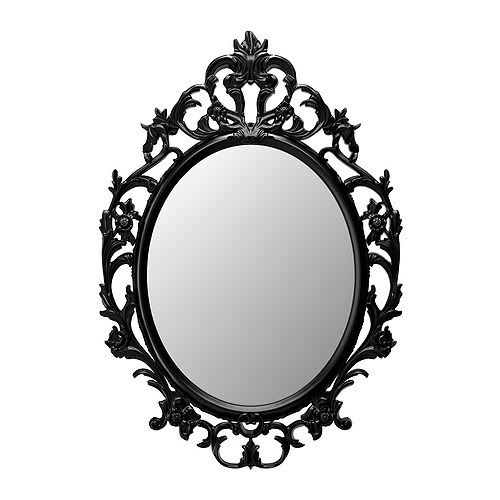
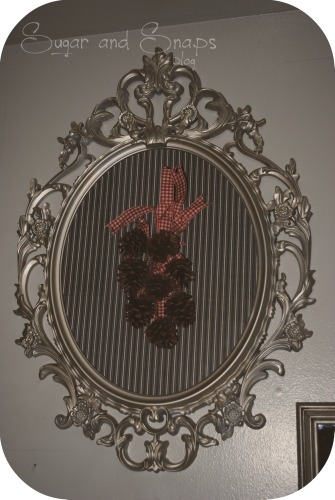
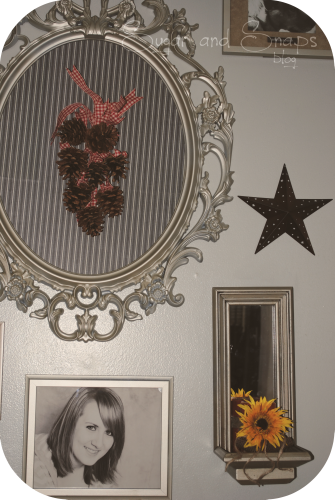
that mirror from awhile back. She got a paint job and some glaze. That candle is a little small for her but it will be replaced soon. That frame with the pine cones might be something someone might recognized.

Until later, Happy Fall!

- Brit

Sunday Snaps #9 {Photography}

H♥me


All images copyright © B.Erin Photography/Sugar and Snaps Blog 2011
Do not use for your personal use or claim photography as your own.

Friday, November 4, 2011

Wire Pumpkins

I found a tutorial on wire pumpkins while venturing around blog land awhile back. I thought they were cute so I tried some. I used different wire and I am just going to post some pictures of how to make them, but you can find the tutorial here at Mad in Crafts blog
I might make a few more of these before autumns over. I have a couple of ideas :)


Wire Pumpkins


You need
Wire (Walmart has 4.92 ft of wire in with the beading section for $1. This is what I used)
Smaller gauge wire (This is what I used to keep them together.)
Wire Cutters, Pliers, and Round Nose Pliers
Tube


 Wrap the wire.


Tie close with other wire. (I used a piece off this ones stem since I cut it down.)


Curl stem and shape pumpkin. 
Now decorate!


 Check out Mad in Crafts for the real tutorial!


- Brit