There are many different ways to stain paper. Blotting with tea bags is one on the easiest. But for this project I wanted to soak my paper. I didn't want to use the only thing of coffee I had so I used some Lipton tea bags I had. So here is a quick tutorial on Tea Staining.
You Need...
Tea (any kind) or Coffee {I used 3 Lipton tea bags}
Hot Water
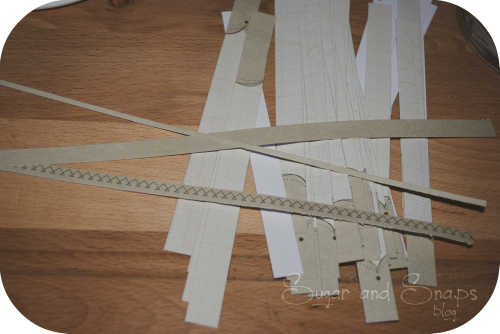
What ever you are staining {This works on paper, card stock, even fabric.)
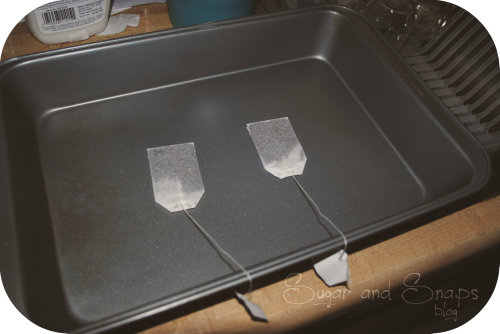
Put your tea in a pan and fill with hot water. I didn't boil my water because I was planing on doing other things while I let the tea soak I also didn't want very dark staining. If you are trying to make the staining go faster make sure you use boiling water. The hotter the water, the faster and more tea comes out which make the staining darker.
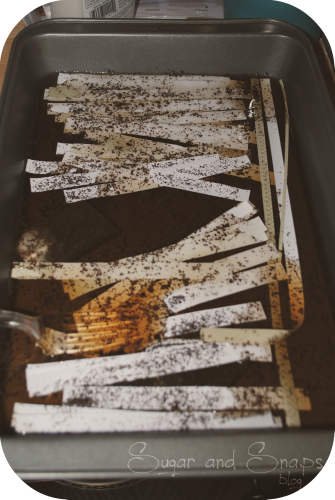
Add your paper once you are happy with your tea. If you wanted to blot stain you would take the tea bags out of the water and simple squeeze a little while blotting the bags onto your paper. I opened my 3rd tea bag and poured the grains into the water. The lose tea will leave darker spots in some places (this method works better with coffee if you are wanting quick results.)
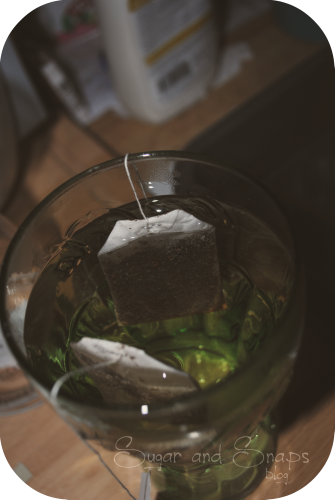
The Hubby came home earlier then expected so I had to speed up my staining a little. I fill a glass with water and pulled my tea bags, microwaved them to get some boiling water and pored it into my soaking paper. It left more tea seep and made things move a little faster. If you find yourself not very patient then try this to get all the color you can out of the bags.
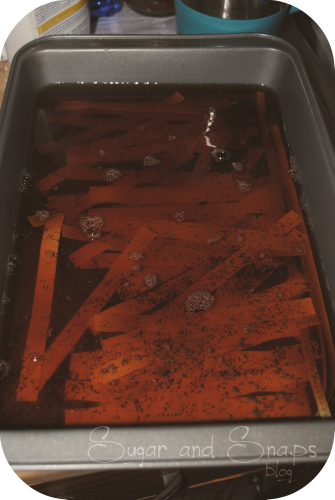
I was happy with my stains after about 2 hours of soaking. I was planing on doing a light soak for most of the day, but the hubby changed the plans. Remove your paper from the water.
At this point you have 3 options for drying. You can place it out flat to dry, hang it, or as I did bake the paper in the oven.
Set your oven to 400°, place paper on a cookie sheet or baking pan and bake for about 5 minutes. For a darker color leave in and watch that no burning takes place.
The reason I baked my paper dry is because it browns the paper more, is a lot faster, and give a nice wrinkly effect that holds better then hanging and flat drying.

I flatten some of my pieces under a book for about an hour, some came out a little to wrinkled. After I brushed off all the lose tea I started my project.
I must say it is my favorite!
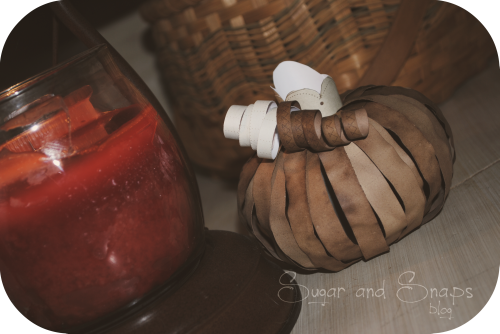
My little tea stained paper pumpkin.
I have been crafting every free hour for the past couple days. Made 3 different types of pumpkins and only spent $5 on one type. I will share more on those later. ;)
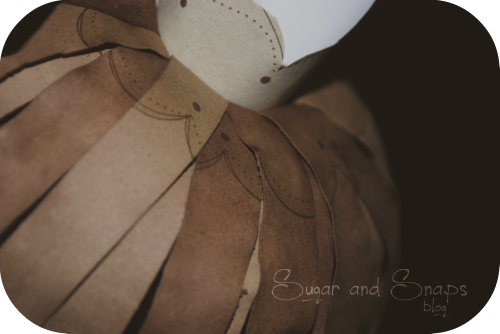
How about a close up.
What do you think?
- Brit
I linked up at..
I found you from the CSH link up! This is a cool idea; such a nice change from standard orange!
ReplyDeleteLeigh
http://fun-to-funky.blogspot.com
Brittany, I just saw your post to CSH Thursday. What a cute idea! Very creative! I am now your newest follower; and I hope you will follow me, too! Blessings to you!
ReplyDeleteLeigh, Thank you :) I am not to big of the normal orange pumpkins.
ReplyDeleteSehnita, I sure will and same to you! Thank you!
Very cute Brittany
ReplyDeleteThis is such a great idea! You did a great job!
ReplyDeleteHow amazingly fabulous!!!! Thank you SO much for the great inspiration and for linking up at Crafty Scrappy Happy!!!!! :o)
ReplyDeleteJaime from crafty scrappy happy