Back in elementary school we made these pumpkins in art so when I saw Mom on Timeout's post floating around in different link parties and things I said "HEY! I remember making those and I can do that without spending money."
That has been my main goal while decorating for fall, money. We really don't have it to spend and I have been lucky enough to have scrap booking paper and things laying around that I don't use to often. So I gathered my items and off I went.
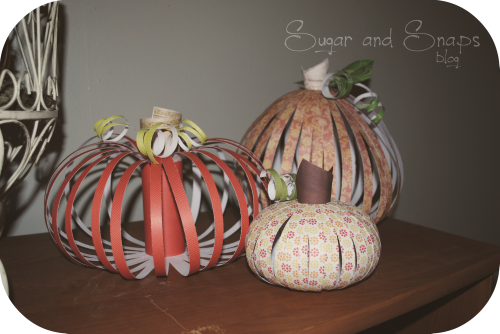
Paper Pumpkins
You can find Mom on Timeout's tutorial here. Mine are a little different but the same overall idea.
You need..
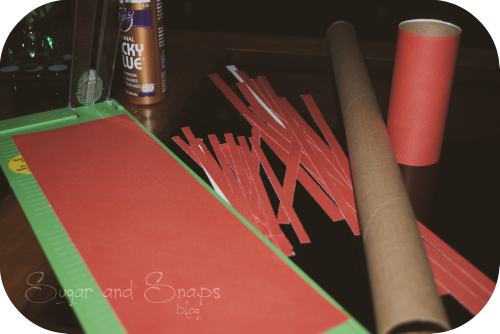
Scrapbook paper (I cut most of mine down so any size should work.)
Cardboard rolls (Toilet paper, paper towels, even gift wrap. I used the roll from redoing our cabinets)
Glue
Optional: If you want to tea stain you will need material for that.
For this pumpkin in the tutorial I used a toilet paper roll. Cut down a piece of scrap book paper to wrap around the roll and glue it on. I got a little ahead of myself and forgot to take photos for this.
The taller your roll the longer your pumpkin, the shorter the rounder. Also play with the paper lengths to get what you want.
Next cut your paper into strips. This pumpkin I used 21 1/4 inch strips, my others I used somewhere between 30 and 40 1/2 - 3/4 inch strips.
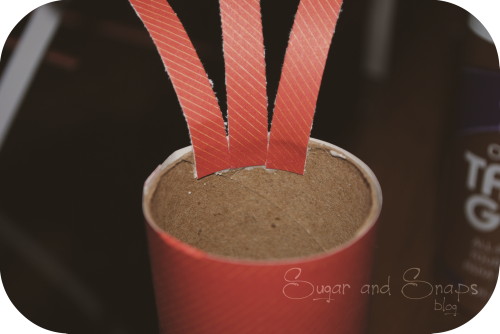
Around the inside of your roll you want to glue the strips. Because I was using Tacky glue I made a line of glue and spread it out before adding my paper. This let the glue start to dry a little so the paper didn't move ad much. Also the weight didn't make them fall off.

Once finished let the paper dry for a minute or two. At this point I added another row of paper strips for a bit of a fuller pumpkin. I didn't on this one but all the others you see above I did. Just all them in between the other strips. After I was happy with everything I glued a ring of paper on the inside as kind of a safe extra. If you want a finished look you can also add a circle to the bottom so you can see though the roll.
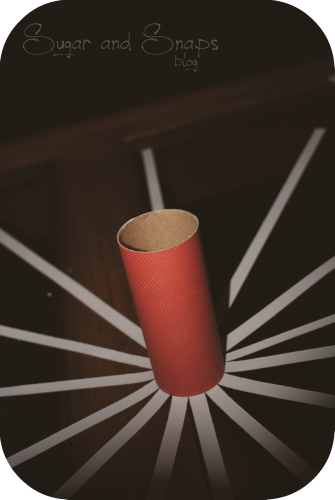
Flip your project over and glue the other side of the paper to the inside of the roll. If you want the top to be rounded try not to push down on the paper to much. If you added another row of paper strips to the bottom, make sure you glue the top layer down first, then the second.
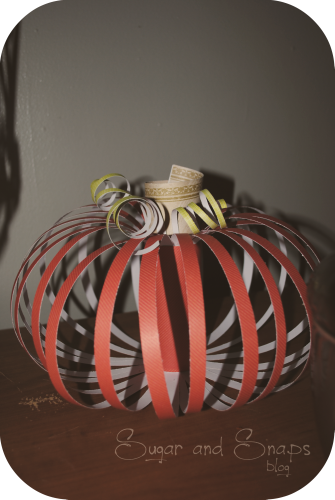
For the stem I rolled a piece of brown-ish scrap book paper and glue it inside the roll. While that glue was still wet I took green strips, that I curled around a pencil, and stuck the tips between the roll and stem.
And that is pretty much it.
These are fun to make and don't take very long. I watched TV while doing them so it maybe took me an hour per pumpkin since my ADHA kept kicking in.
- Brit
No comments:
Post a Comment