Sunday, January 29, 2012

Sunday Snaps #19 {Photography}


All images copyright © B.Erin Photography/Sugar and Snaps Blog 2011
Do not use for your personal use or claim photography as your own.

Sunday, January 22, 2012

Sunday Snaps #18 {Photography}

When two people love each other...

All images copyright © B.Erin Photography/Sugar and Snaps Blog 2011
Do not use for your personal use or claim photography as your own.

Sunday, January 15, 2012

Sunday Snaps #17 {Photography}

Winter


All images copyright © B.Erin Photography/Sugar and Snaps Blog 2011
Do not use for your personal use or claim photography as your own.

Sunday, January 8, 2012

Sunday Snaps #16 {Photography}

Make Me Fly

All images copyright © B.Erin Photography/Sugar and Snaps Blog 2011
Do not use for your personal use or claim photography as your own.

Sunday, January 1, 2012

Paper Stars

On top one of my Paper Trees I had a little paper star.

I promised that would be my next tutorial, well its one of the next ones. I am going to show how to make them today. :)
These little guys I learned to make from a friend while we were living in Japan. She had been making jewelry with them. I just wanted a jar full of them, so I got to pulling out paper and my paper cutter.


Paper Stars


You Need

Paper
Paper Cutter


I believe people consider this origami, but these are really easy to make. I sit and make them while watching TV or a movie. I have used many different types of paper, sturdier paper works best. Construction paper will really not work at all. Scrap-booking paper is perfect, for this project I also used some book pages and sheet music. (Yes that is Breaking Dawn up there. Yes I cut it up...) 


First you need to cut your paper into strips. Depending on the out come size you want will depend on the width of the paper. For a star that is about 3/4 of an inch in size, my paper was about 1/2 inch in width. The length always depends on the paper you are using. 12 inch scrap book is perfect for 1/4 - 1/2 in width, but the ones I made out of book pages I used 3 or 4 strips to make it sturdier.


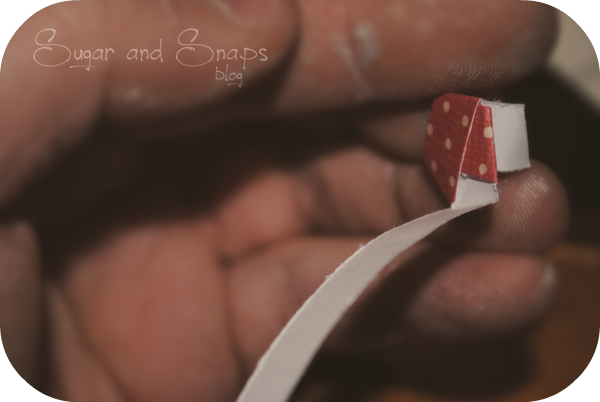
Next you start a "knot."
Excuse the paint on my hands in these photos, I was painting bells before this.


Before you make any creases you need to make sure the tail piece you see me holding is between a 1/2 inch and 3/4 inch. Just eye ball it, it doesn't have to be perfect. But you just some want a 3 inch tail back there.


Crease your "knot" to get a pentagon shape. My tail on this star was a little long, but you can just fold it over or even cut it a little if you need. Its just a waist of paper ):


Now you will start to make your folds. Basically you will fold the longer tail over each side. It will pretty much guide itself, just keep your eye on it. Once you are down to your last little bit you will tuck it under a fold on the side it ends on. If there isn't enough to reach then fold the tail under itself and tuck it under the previous side.
If you are using a thin paper and need to ad more strips, before you tuck the end under just lay the top of another strip against it and start folding. Folding the paper over and over again will keep the paper in place. ;)


You should have this pentagon then. If your tail has a little trouble holding you can always add a little tiny bit of glue. Make sure you let it dry before the next step though.

Pinch each of the 5 sides like so.

And you have a star!
Now like everything, not all your stars will be perfect. Some will be a little malformed but depending on what you are using them for it shouldn't matter to much.

Make different sizes and use them in anything. You can even use a bit of spray adhesive and roll them in some glitter! I often seal mine with a little flat clear coat to keep them together and helps a bit if some how they get damp.
If you need a better tutorial try this: origami-fun.com
Have fun!

~ Brit

Sunday Snaps #15 {Photography}

Happy New Year!


All images copyright © B.Erin Photography/Sugar and Snaps Blog 2011
Do not use for your personal use or claim photography as your own.

Saturday, December 31, 2011

Have yourself a Merry Little Christmas {Decorating} 2011


I shared my Christmas Tree last week. Just wanted to share the rest of my decorations before 2011 ends.


Lets start with our book shelf. I bought a small live tree from Walmart, its sprayed with some fake snow but it will go away when the needles shed. Hopefully I can keep it alive. ): My Ikea lantern of course and  of my favorite ornaments that are 2 head for our tree. A milk bottle filled with Epson salts and a taper along with some other touches. I feel like its a little cluttered but I left it alone because the Hubs said he like it. 


The deer in the back was one of my thrift store finds earlier this year. Along with a tree plate I found at the same time. I painted them silver to match my decorations and they both covered pretty well. Actually the plate was the best thing I have painted this year. No problems so I love it! 


Just a small area on one end table on the left of the couch. That little tree is one of those old fashion cookie jars that I filled with some small Christmas balls. The Cardinal candle is from the dollar section at Target.


That other tree plate as one of my find from my first trip to the Habitat ReStore. It has some texture on it so its a little different then the other. Some candles and Ball Jars with some Epson salts with votives. My poinsettia that I really hope I don't kill. The star taper holders were 2 other habitat store finds. 
And of course Dickens! He is the little mouse up there that I could not leave without. He was just to adorable.


My shelf is a little boring. I did have a wreath for on the mirror but it got destroyed somehow. My husband also doesn't know that the stocking is suppose to be cuffed, so he unrolled it to stuff it. I enjoyed the gifts inside though! ;) Tempy has stolen both those loofa dogs, Tally really loved them when he was small but I guess he doesn't anymore. 
We can't forget about my Frosted Glass Window Hanging! <3 I love it...


Coming in from the hall and Kitchen I made this garland to hang since my Kitchen decorations are a rustic mix. I really didn't get to put them out this year sadly. I am still using the kitchen table as a computer desk. But we are slowly getting things finished around the house. 

  
By the way... I will never paint bells again. I tried them just laying on paper, it didn't work. I also used primer but I still had some issues with some bells. But I am still happy I at least tried it.


My wreath got a new addition that now has a shattered leg thanks to Tempy. >:( But at least it was only a dollar and I am still going to try and fix him.
He started out like this. The one laying down I have other plans for.


Just simple outside. I was hoping to get some lights up in the windows but never found clips to hang them. Maybe next year.

I am enjoying the clearance Christmas items. I have a bunch of new items that I am excited to use next year!


~ Brit