Saturday, December 31, 2011

Have yourself a Merry Little Christmas {Decorating} 2011


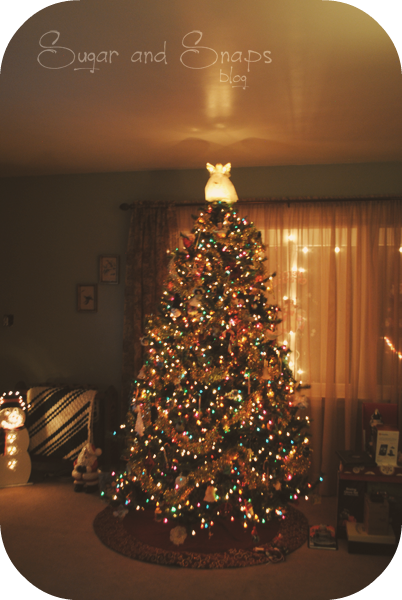
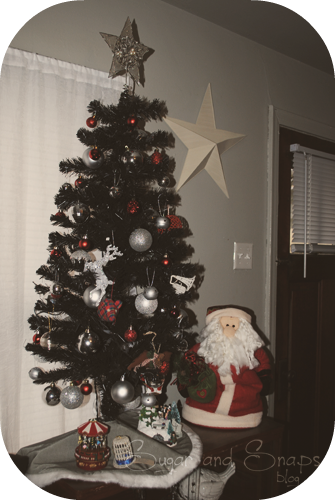
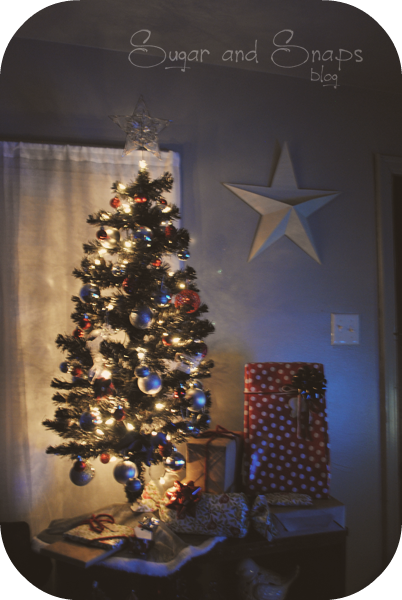
I shared my Christmas Tree last week. Just wanted to share the rest of my decorations before 2011 ends.


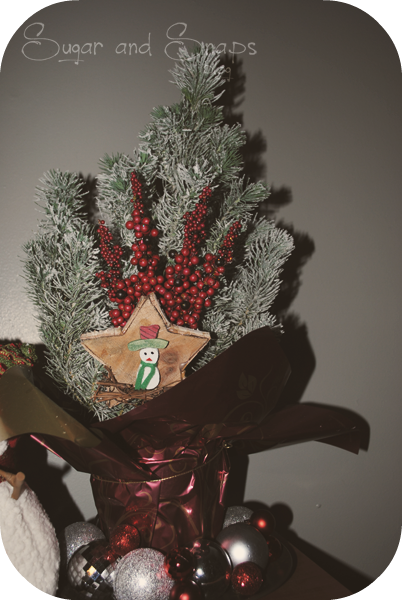
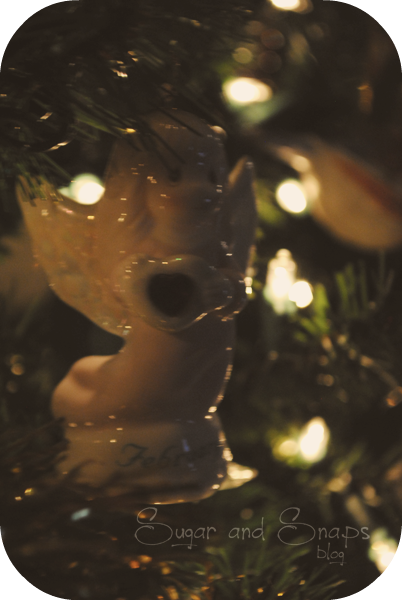
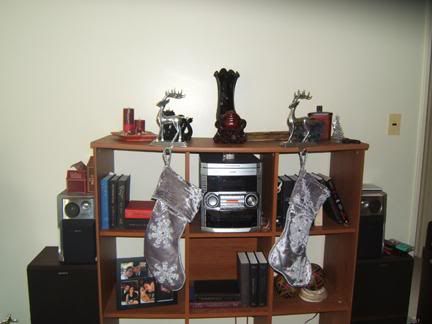
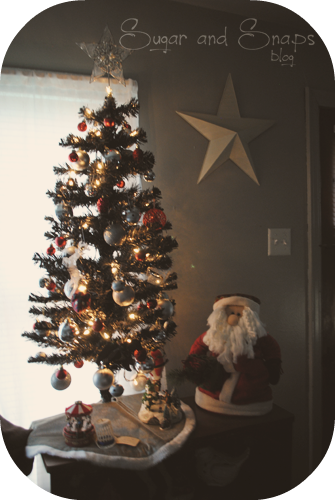
Lets start with our book shelf. I bought a small live tree from Walmart, its sprayed with some fake snow but it will go away when the needles shed. Hopefully I can keep it alive. ): My Ikea lantern of course and  of my favorite ornaments that are 2 head for our tree. A milk bottle filled with Epson salts and a taper along with some other touches. I feel like its a little cluttered but I left it alone because the Hubs said he like it. 


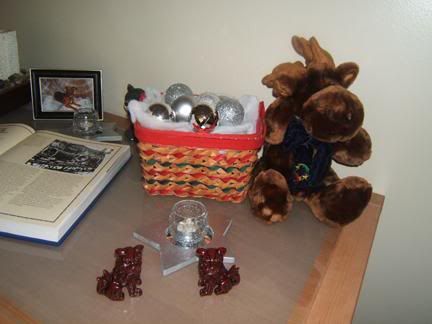
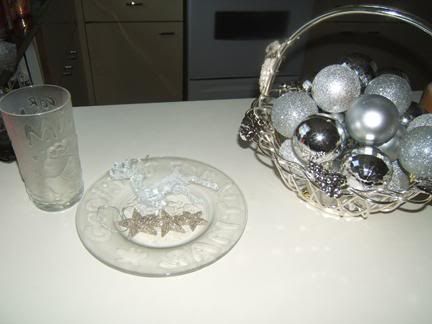
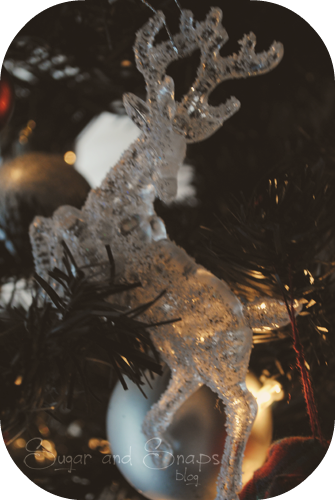
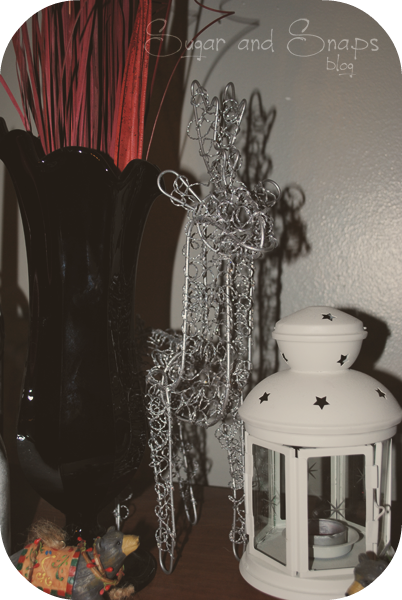
The deer in the back was one of my thrift store finds earlier this year. Along with a tree plate I found at the same time. I painted them silver to match my decorations and they both covered pretty well. Actually the plate was the best thing I have painted this year. No problems so I love it! 


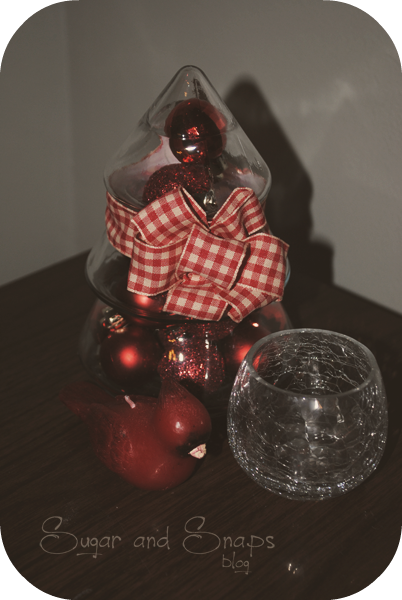
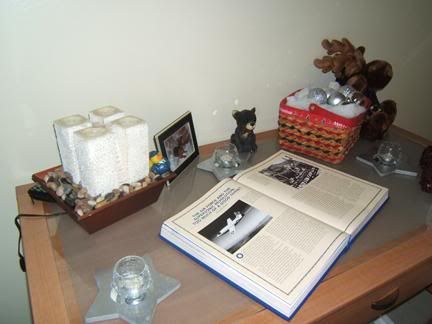
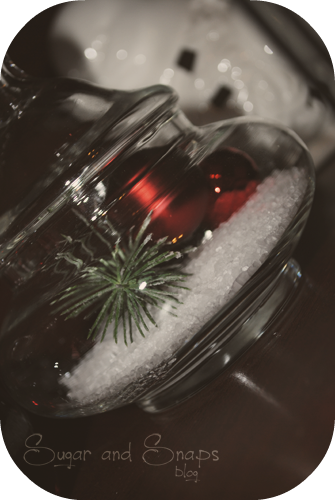
Just a small area on one end table on the left of the couch. That little tree is one of those old fashion cookie jars that I filled with some small Christmas balls. The Cardinal candle is from the dollar section at Target.


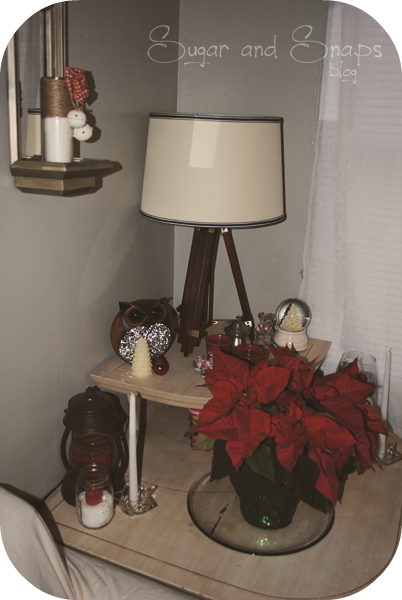
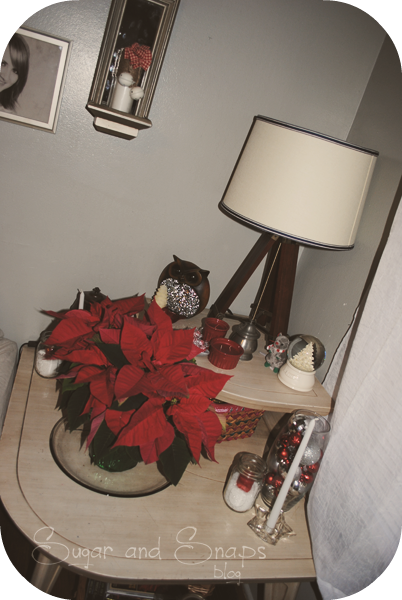
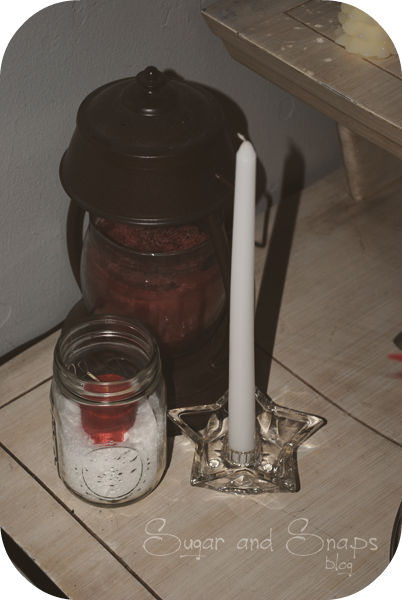
That other tree plate as one of my find from my first trip to the Habitat ReStore. It has some texture on it so its a little different then the other. Some candles and Ball Jars with some Epson salts with votives. My poinsettia that I really hope I don't kill. The star taper holders were 2 other habitat store finds. 
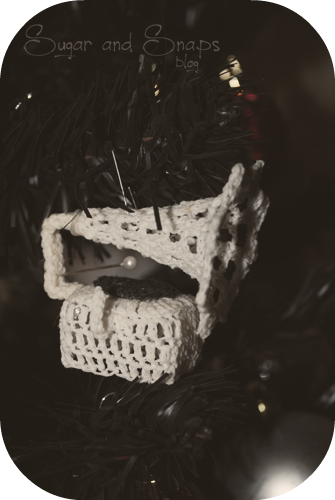
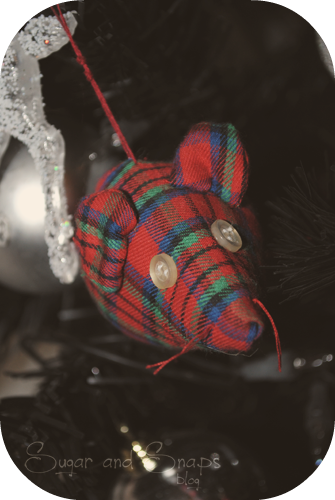
And of course Dickens! He is the little mouse up there that I could not leave without. He was just to adorable.


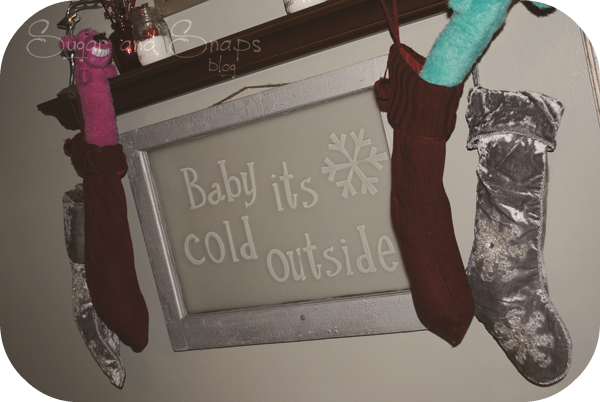
My shelf is a little boring. I did have a wreath for on the mirror but it got destroyed somehow. My husband also doesn't know that the stocking is suppose to be cuffed, so he unrolled it to stuff it. I enjoyed the gifts inside though! ;) Tempy has stolen both those loofa dogs, Tally really loved them when he was small but I guess he doesn't anymore. 
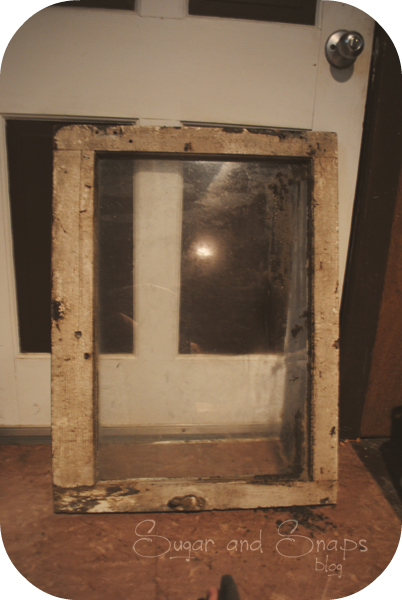
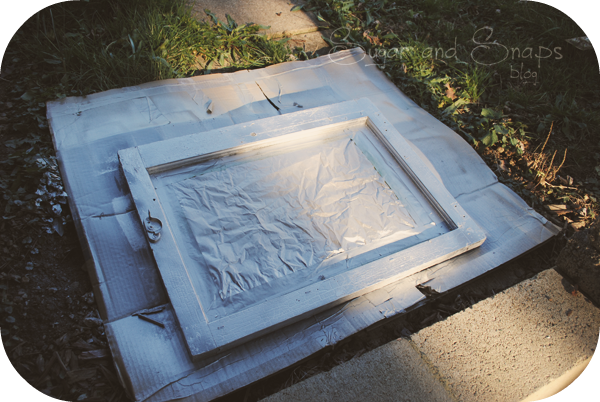
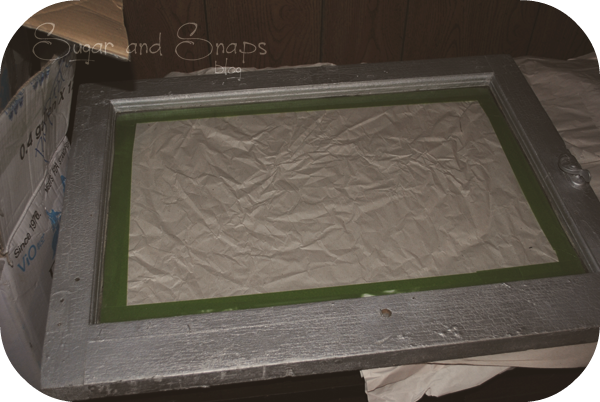
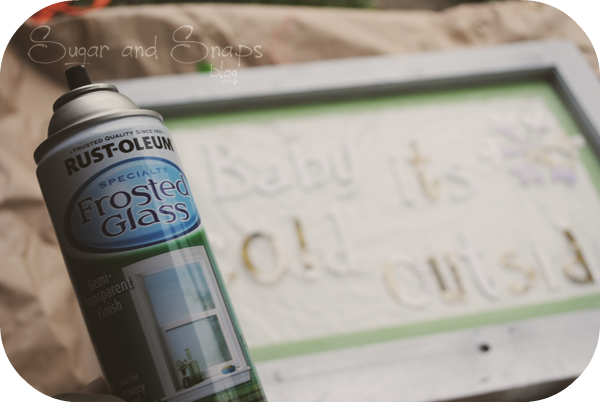
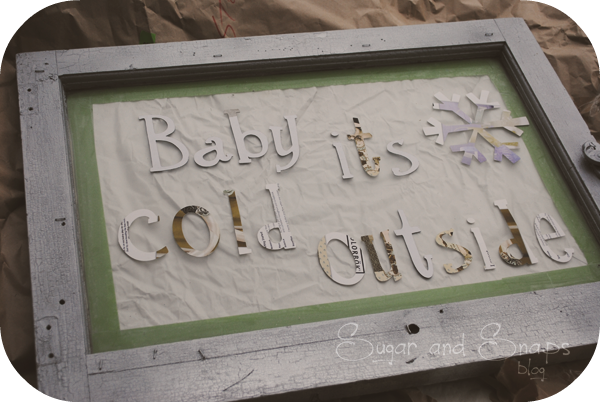
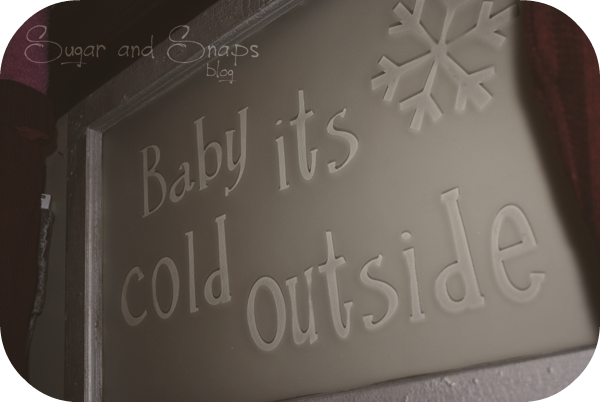
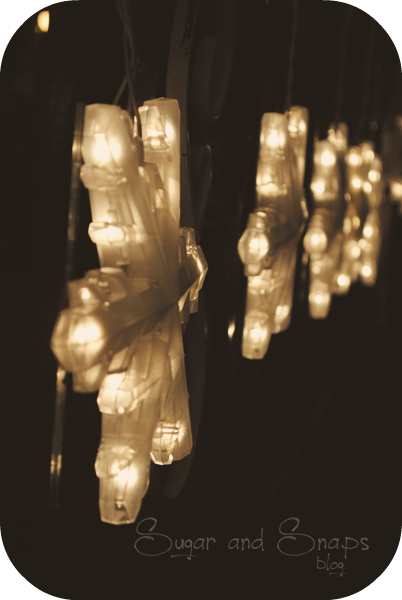
We can't forget about my Frosted Glass Window Hanging! <3 I love it...


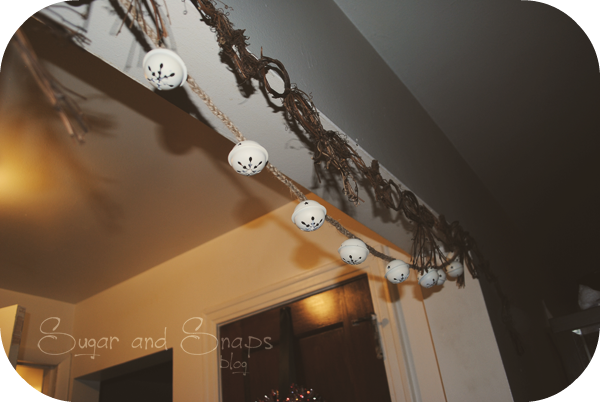
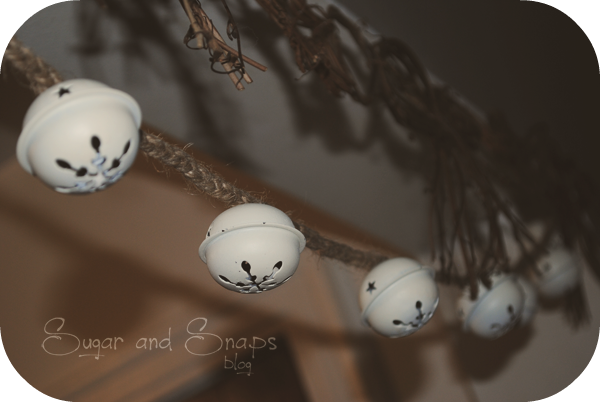
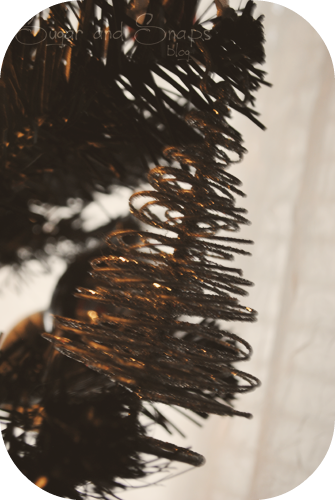
Coming in from the hall and Kitchen I made this garland to hang since my Kitchen decorations are a rustic mix. I really didn't get to put them out this year sadly. I am still using the kitchen table as a computer desk. But we are slowly getting things finished around the house. 

  
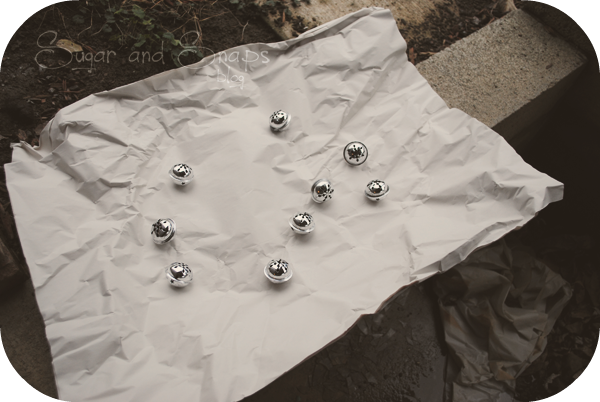
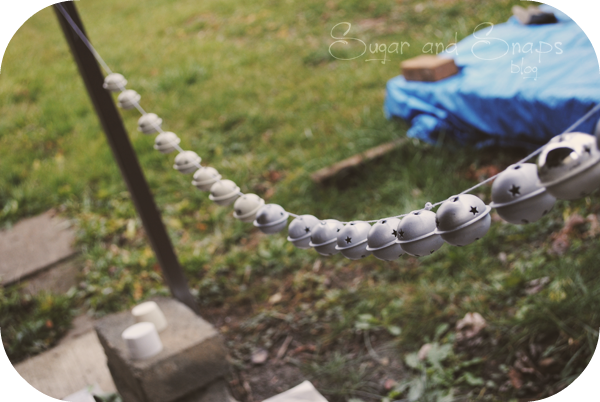
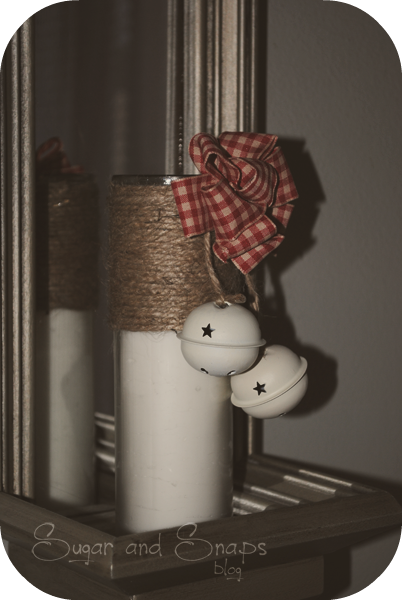
By the way... I will never paint bells again. I tried them just laying on paper, it didn't work. I also used primer but I still had some issues with some bells. But I am still happy I at least tried it.


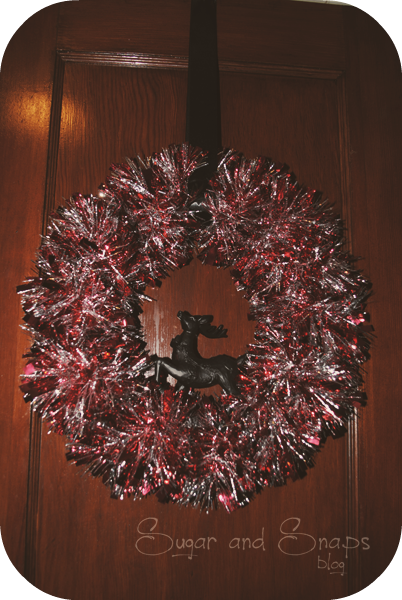
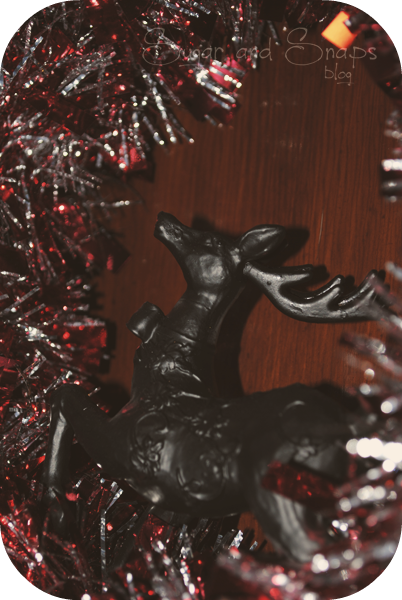
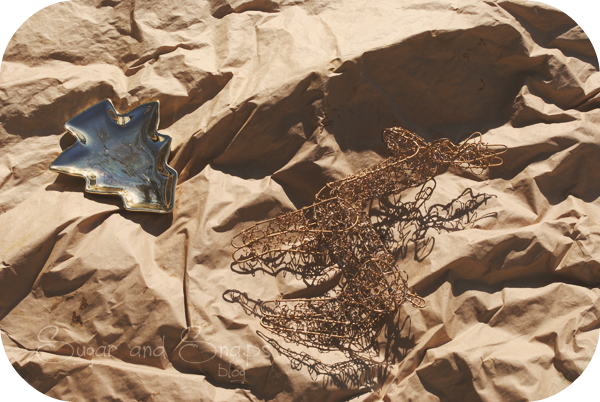
My wreath got a new addition that now has a shattered leg thanks to Tempy. >:( But at least it was only a dollar and I am still going to try and fix him.
He started out like this. The one laying down I have other plans for.


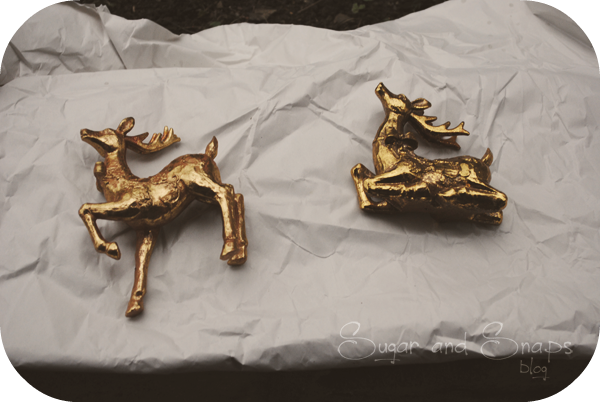
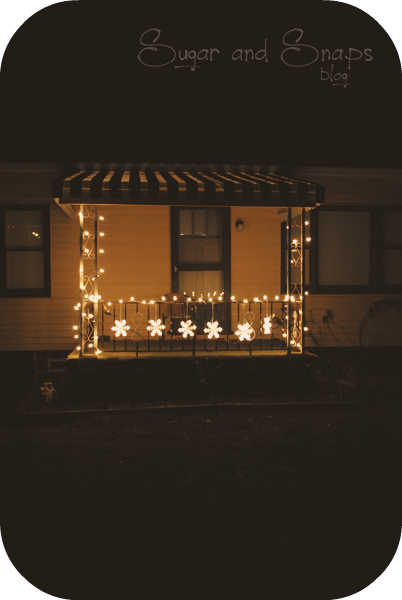
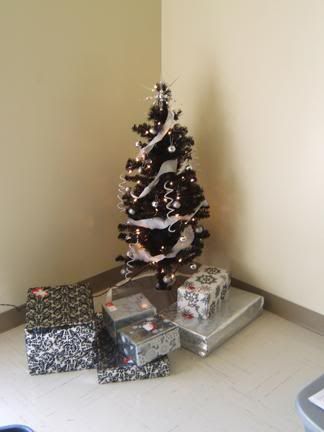
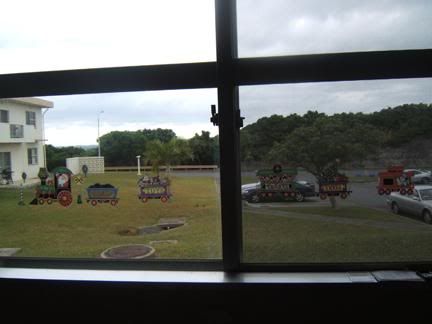
Just simple outside. I was hoping to get some lights up in the windows but never found clips to hang them. Maybe next year.

I am enjoying the clearance Christmas items. I have a bunch of new items that I am excited to use next year!


~ Brit

Thursday, December 29, 2011

Frosted Glass Window Hanging: Tutorial

I really want a chalk board for my gallery wall. its such an easy tool for holiday decorating. I got the idea for this project after I saw a chalk board with "Baby it's cold outside" written on it. I had been trying to figure out what I might want to do with the windows I got and it just popped into my head. I am not sure if anything like this has been done, but enjoy!


Frosted Glass Window Hanging


You need

A window or frame
Spray Paint
Spray Adhesive
Frosted Glass Spray paint
Letter cut outs
Hanging material


First I cleaned the window as well ass I could. It had lots of dry mud and lose paint on it. My vacuum took care of that. I sanded down the frame a little, I wanted some of the wear and cracks so I didn't completely strip it.


Next I taped up the glass and used some scrap paper from moving to keep paint off the glass. I used silver to match my Christmas decorations. Now I wish I would have used a flat black or Chalkboard paint, had a little to much silver I feel. 


I had to most my window inside after painting to let it dry. It was pretty cold out and was getting ready to rain so I couldn't finish that day. But I did go and cut out my letters. You can use anything, I used my cricut and cartage "Feelin Groovy" to get a fun type of lettering. 
After my paint was dry I removed the tape and paper. Using spray adhesive I glued down my letters. Try not to use to much since it will smear and move if you mess with it. I have a small mess up in my frosted area because of a glue mishap. 


Spray your glass. I didn't bother to tape off the frame because I wanted to tone down the shine. I did coat the frame with 1 layer of a clear matte top coat. The glass spray did the rest for me. I think I did 5 layers of frost paint on my window.

I let my glass dry for a little over 24 hours. I wanted to make sure nothing was tacky and everything came off perfect. Once dry I pulled off the letters and was ecstatic with the finished window.


Add your hanging hardware and enjoy!


I wanted to make the window look like someone wrote it in the fogged glass. I didn't get the effect I wanted but I still love the outcome. I thought about it after and figured once the you sprayed the paint you could write it in the wet paint. Would have to get a good coat on there though... Maybe a paper down with some nail polish remover could give you the same effect after you applied your layers and got the frost you liked. 
I am enjoying my window how ever. I shared a picture of it with everyone this Christmas. I think my mom secretly wants to steal it. I do love it though!

Hope you enjoyed!

- Brit


I linked up at...

Home for the Holidays

I hope everyone had a wonderful Christmas. Mine went well other then having to work both Eve and Day, but hey that is life. My grandmother's birthday the 26th was what I cared more about. We missed my cousins and everyone opening gifts, we had stopped at my Mother-in-laws to do Christmas with them. But I had a nice small Christmas with my parents and sister after dinner. It was pretty perfect.... And my Dad loved his gift which made everything a little better. :)


Has anyone ever seen this movie? This what what I got my Dad for Christmas, its one of my families favorites. We have an old VHS that is probably close to being worn out. I was actually surprised it didn't go into the DVD player right when he opened it. I walked by it in the store and grabbed the only 2 copies they had because I knew it was perfect.
Sadly I didn't get to make any of the gifts I wanted to make. I ran out of time, but I am starting to work some now for next year!

But anyway, what I wanted to share today is my family's Christmas tree. Its one of the things my mom, sister, and I did together every year. I kinda miss it but its nice to go home and see what new ornaments my mom got each year. We kinda have a tradition of getting 1 ornament every year on Christmas Eve night. Mom always got us one so my sister and I started getting some for her since most of her tree will be empty once I take my ornaments and my sister takes her.


That tinsel on there is about 25 years old, maybe older. And it still refuses to fall apart... my tinsel I bought for my wreath started falling apart as soon as I bought it. And of course my mom and myself like white lights better then multi, but before my mom got a prelit tree she would use about 6 or 7 strands, wrapping each and every branch with multi colored lights... every year. I still do not know how she did it. So a few years ago when she got her first prelit tree she made sure to get a white and multi tree. its a happy middle for her and my sister, not so much for me.
All the ornaments are a mismatch of things from over the years. Most are bought, but some my sister and I made, some my grandmother and family made. Here are some of my favorites...


Of course my first Christmas is one I always was sure to hang. Its not the prettiest but its mine and no one in the house can argue that with me.


Another one of mine that I always hung. This was my pre school in Virgina, yes that is a picture of me on the top there.


Just a few of the many ornaments my Grandmother use to make. The clay dog was made by my cousin however. An image of our family Lab, Sierra.


My precious moments Birthday angel.


And of course I can't forget the pickle. I forgot to buy one of these again this year... then even had a bunch at Pier 1 when I went to spend my gift cards. Oh well, I will have to find a special one some year.

Tomorrow I will share the rest of my decor before I tear it down. I already started thinking about Easter decorations. :o I know to early but I want to get all my ideas made this year.

But all in all I hope everyone had a wonderful Christmas!

- Brit

Friday, December 23, 2011

12DoCc: Homemade Dog and Cat Cookies


I know, "what's this!? a 13th recipe?" Yesyes, we can not forget our doggie and kitty friends this Christmas! They need their Christmas cookies too. This post actually has 3 recipes in it, 1 for dogs and 2 for cats. So get up and go make some last minute treats for those furry family members that some people forget are just as important. I know mine are <3

Homemade Dog Cookies

Ingredients

1 cup all-purpose flour
1/4 cup wheat germ
1/4 cup brewer's yeast
1 teaspoon salt
1 1/2 tablespoons canola oil
1/2 cup low-sodium canned chicken stock, plus more for brushing


Preparation

1. Preheat oven to 400 degrees. In a medium bowl, whisk together flour, wheat germ, yeast, and salt; set aside

2. Place oil in a large bowl. Add stock and flour mixture in three alternating batches, beginning and ending with stock. Mix well.

3. On a lightly floured work surface, roll out dough to about 3/8-inch thick. Shape biscuits using a dog-bone-shaped cookie cutter or by cutting around a store-bought dog bone with a butter knife.(Make biscuits that are appropriate for your dog's size.)


4. If desired, you can spell out your dog's name or a holiday message in the dough with a toothpick (wet the toothpick first so it won't stick).

5. Transfer to parchment-lined baking sheets. Repeat with remaining dough.

6. Bake biscuits 10 minutes. Brush with stock; rotate baking sheets, and bake 10 minutes more. Turn off oven, leaving door closed. Let dog biscuits stand in oven to dry completely, about 1 1/2 hours. Wrap as a gift, or store in an airtight container at room temperature.


Prep and Cook Time: about 2 hours
Notes: Store them in an airtight container.
Yield: about 5 dozen.


---------------------------------------------------------------

Homemade Cat Cookies


Ingredients


1 C Whole wheat flour
1/4 C Soy flour
1 t Catnip
1 Egg
1/3 C Milk or cat's milk
2 T Wheat germ
1/3 C Powdered milk
1 T Unsulfurated molasses
2 T Butter, vegetable oil, or canola oil


Preparation

1. Preheat oven to 350F. Mix dry ingredients together. Add molasses, egg, oil and milk.

2. Roll out flat onto oiled cookie sheet and cut into small, cat bite-sized pieces. Bake for 20 minutes. Let cool and store in tightly sealed container.


Prep and Cook Time: about 1 hour
Notes: Store them in an airtight container.


---------------------------------------------------------------


Not everyone wants to give their kitties cat nip, so here is a catnip free recipe.

Cat Crackers


Ingredients


6 Ounces Undrained tuna
1 C Cornmeal
1 C Flour
1/3 C Water


Preparation

1. Preheat the oven to 350 degrees. Measure all of the ingredients into a bowl and mix thoroughly with your hands.

2. Roll out to 1/4 inch thickness and cut into treat sized pieces. Place on a greased cookie sheet.

3. Bake for about 20 minutes or until golden. Let cool.


Prep and Cook Time: about 1 hour
Notes: Store them in an airtight container.

12DoCc: Gingerbread


What Christmas isn't complete without some Gingerbread. If its people, houses, or any shapes and animals this is a classic seasonal cookie. Fun for the whole family to get together and decorate some lovable cookies!

Gingerbread

Ingredients

1 cup (2 sticks) unsalted butter, room temperature
1 cup firmly packed dark-brown sugar
1 large egg
1/2 cup unsulfured molasses
2 1/4 teaspoons ground cinnamon
2 teaspoons ground ginger
1 teaspoon ground allspice
1 teaspoon baking soda
1/4 teaspoon salt
4 cups all-purpose flour, plus more for dusting
Sanding sugar and miniature candies, for decorating


Preparation

1. In a large bowl, beat butter and sugar on high speed until light and fluffy, about 5 minutes. Add egg; mix well. Beat in molasses, cinnamon, ginger, allspice, baking soda, and salt. On low speed, add flour a cup at a time, mixing until incorporated.

2. Divide dough into quarters; shape into disks, and wrap into plastic. Refrigerate until firm, about 3 hours.

3. Preheat oven to 375 degrees with racks in top and bottom third. On a lightly floured work surface, roll out a dough disk to 1/8 inch thick. Cut out cookies, rolling out any scraps and additional disks as needed until you have all the cookies you can get. Transfer to parchment-paper-lined baking sheets, leaving 1 inch between cookies. Refrigerate 20 minutes.

4. Bake cookies, two sheets at a time, 7 minutes; rotate pans top to bottom and front to back, and continue baking until cookies are firm when touched, about 6 to 8 minutes more. Let cool on baking sheets 5 minutes. Transfer to wire racks; let cool completely. Decorate cookies as desired.


Prep and Cook Time: about 1 hour, another 1 or more for decorating.
Notes: Wrapped dough can be refrigerated up to three days. Soften slightly at room temperature before rolling out. You can store them airtight for up to 1 week.
Yield: 2 dozen.

Thursday, December 22, 2011

12DoCc: Stained-Glass Cookies


Over the years I have seen many kinds of stained-glass cookies. I changed a few of these when I was still in elementary school for some unique cookies for a friends Christmas party. I made them almost every year after that using the hard candy my family makes around Christmas. While we were in Japan I didn't have access to that candy like previous years so I substituted with Jolly Ranchers and Life Savers. Try any hard candy though, I am sure it will work fine.

Stained-Glass Cookies


Ingredients

Any sugar or cut out cookie recipe (I use my grandmother's sandtart recipe.)
Hard candies


Preparation

1. Prepare dough for Cookies.

2. Roll dough 1/4 inch thick. Cut cookies into desired shapes and place on silicone- or cooking parchment-lined baking sheets (see notes). Use smaller floured cutters or a small, sharp knife to cut out and lift a design from the center of each cookie (such as a small star from the center of a larger star or a round), leaving at least a 1/2-inch border around cutouts.

2. Crush transparent, colored hard candies.

3. If your cookie recipe takes longer then 10 minutes to bake. Bake cookies without the candy till you have about 7-8 minutes left. Remove from over and fill cutouts with candy Bake in oven until cookies are golden and candy is melted.

4. Let cookies cool on sheets until candy is firm. Slide a thin spatula under cookies to release and transfer to racks to cool completely.


Prep and Cook Time: about 3 hours (give or take depending on your recipe)
Notes: You can store them airtight for up to 1 week.
Yield: Depends on your cookie recipe.

Wednesday, December 21, 2011

12DoCc: Rum Balls


Just thinking about these guys makes me hungry. They are another simple cookie but one of my favorites. I have had them rolled in everything from the traditional sugar, to powered sugar and crushed peppermints. Even peppermint bark!

Rum Balls


Ingredients

Vegetable oil, cooking spray
3/4 cup (1 1/2 sticks) unsalted butter, cut into pieces
6 ounces semisweet chocolate, finely chopped
3 large eggs
1/2 cup packed light-brown sugar
1 teaspoon pure vanilla extract
1/2 teaspoon coarse salt
3/4 cup all-purpose flour
1/4 cup plus 2 tablespoons dark rum
Coarse sanding sugar, for rolling


Preparation

1. Preheat oven to 350. Coat a 12-by-17-inch rimmed baking sheet with cooking spray; set aside. Melt butter and chocolate in a small heatproof bowl set over a pan of simmering water, stirring occasionally. Set aside.

2. Whisk together eggs, brown sugar, vanilla, and salt in a large bowl. Stir in chocolate mixture, then fold in flour. Pour batter into prepared baking sheet. Spread evenly with a rubber spatula. Bake until top is shiny and a cake tester inserted into center comes out with some crumbs attached, about 10 minutes. Let cool completely on a wire rack.

3. Break up brownie into small pieces; transfer to the bowl of an electric mixer fitted with the paddle attachment. With machine on low speed, pour in rum, and mix until crumbs start to come together to form a ball.

4. Shape into 1-inch balls, and roll in sanding sugar to coat. Transfer to a baking sheet; refrigerate, uncovered, until cold, about 2 hours. Serve chilled or at room temperature.


Prep and Cook Time: about 2 and a half hours
Notes: You can store them airtight for up to 2 days. Can freeze and pull out to thaw before serving.
Yield: 4 dozen.

Have yourself a Merry Little Christmas {Decorating}: Tree

I love decorating for Christmas, and while the snow never works to my schedule, I still love being with my family. This year I have been working most of the time and barley got my Christmas decorations up. I got a few and the ones I have crafted have taken me longer due to time issues. ): It hasn't been a very merry Christmas to me. But I have Thursday and Friday off so hopefully I can finish things up and get a few gifts bought and made. {Hey I can dream right?} Then I work Christmas Eve and Christmas morning. Once I am out of there at 1pm it is home to load everyone into the car and a 2 hour drive to be with our families. I will let you know how that goes.
But for now let me introduce you to my tiny loved tree. 


When I got married and I was getting ready to leave for Japan, My Nana and Mother took it upon themselves to get me everything I need to decorate for Christmas. Mom gave me some old things of hers that I liked, and then also went shopping together to get me a tree and ornaments. All I was asked was what color I wanted to do my christmas tree in. My mother already knew I wanted a black tree, so I told them I was thinking silver.... for everything. They came home with bags full of ornaments and a small 4ft black tree. I loved it and I was so excited for Christmas. 
When The time came and I put up our tree, that was all I had. The tree and a few other decorations, blah.


Not a very festive Christmas. But it was home for us, the stockings and gifts we didn't get until almost 3 days before Christmas. This gifts under the tree we actually opened later that day since my mom told us too, they were my Hubby's train and my village (the start to it). We received another box Christmas eve with other gifts and cookies. <3 Oh how I miss going to the beach Christmas day.

Anyway, this year I changed my colors. I felt my tree was kinda bland just silver. Plus this year I con't not find many silver items! So I added red, white, and black. I have no black on the tree other then the tree itself but I like the pops of red on it.


Some of the ornaments I was given our first Christmas.
I love that deer.


My favorite decorations are the homemade ones.
These 3 were made by my Grandmother who let me pick out some from our craft sale stuff. I choose more of the crochet ones because her making those is one of my favorite memories. Sitting at the table with them, container of Elmer glue, pins and foam objects. 
The same idea of how I made some crafted trees that I will share later.

The mouse I chose because it reminded me of my Pap. So many memories in one little object, I love it. 2 main ones stick out. My Pap drove truck since he was 14, his handle on the CB was House Mouse. I LOVED riding in the truck with him. And the pattern on the mouse matches a pair of shorts he use to wear. 
I miss that man.


This one is special to me in a whole other way. I was lucky enough to have meet my Great Grandmother, I wasn't old enough to remember everything about her but I remember her. Stories about her just stick to me and I love hearing family talk about her. And while my grandmother had a lot of siblings, To me my grandmother is almost a complete chip off of her. This hat was made by her and it was one of the only ones my Grandmother had. She knew I loved top hats and pull it out just for me. 


Yes, My tree sits on a new piece of furniture, well new to me. Apparently even since I was little I asked my grandmother if I could have this stand. I was to take it with me to Japan but I was afraid it would get damaged, but I have it now! 
Their are 2 shelves inside, the bottom holds my small village and the top has a few decorations on it. My Paper Trees, 2 finds from my first visit to the Habitat ReStore, and my white bird.


And that is pretty much it for right now. I have my bookshelf half finished and my wall needs a few more things. But I will share later this week! For now, enjoy your day and see you soon!


- Brit